Many of us can remember seeing black & white photos of our grandparents, and in today’s age of Instagram, it’s often bewildering to think that once upon a time, black & white photos were all there were.
One of my passions is restoring, and then colorizing old images. I’m often asked for tips and suggestions, so I thought I’d create a tutorial showing just how I achieve these amazing results!
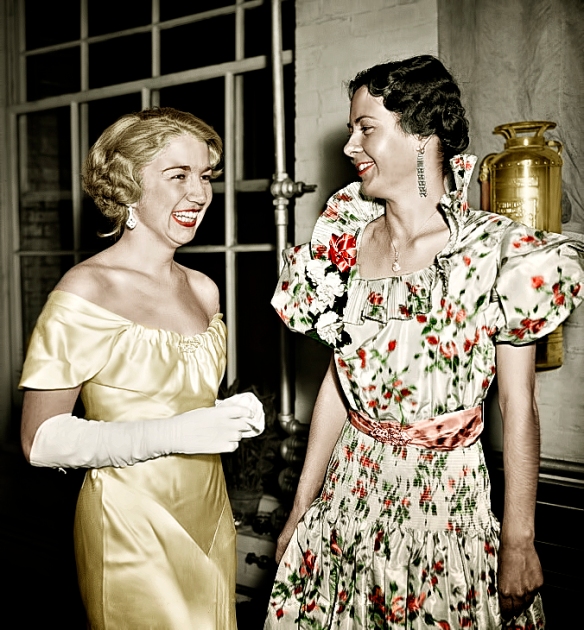
Here is a before and after shot, to give you an idea of what’s possible:
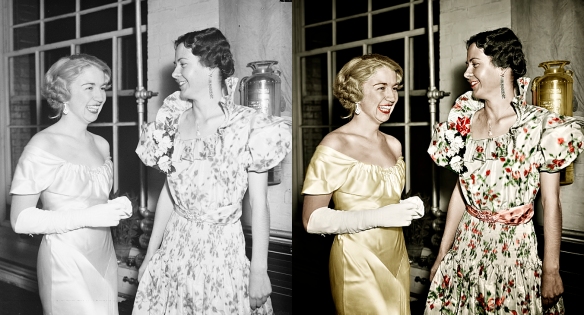
As you can see, there is a dramatic difference between the two.
The actual processes involved in colorizing a black and white photo aren’t particularly complex, just somewhat time consuming.
What follows is just one of the many different ways of digitally colorizing a black and white photo – this just happens to be my own workflow, and one that works extremely well.
A few things to note before we start:
- I use a PC, not a Mac, so forgive me if the commands and keyboard shortcuts don’t match a Mac. I’m sure you’ll still be able to follow the process.
- Don’t get too caught up in getting the colors absolutely perfect for each section from the outset.
For example, sometimes skin color will look completely wrong, but once the entire image is finished, it all comes together.
Working in the way I suggest, you can easily go back and tweak each layer as required once the entire image has been colorized.
- Some of you may prefer to use Selections instead of using the Brush tool to apply the color – whatever works best for you. Personally, I enjoy painting as I feel that I have more control over the finished result.
Before you begin to add color to any photo, spend a few moments thinking about the following points:
- Examine the image, and identify clothing styles, equipment, and building materials as necessary.
Then, locate similar colored images on the internet, and copy them to use as color samples only.
In this example, I searched for “ladies formal dress styles from 1935”, as the image I’m working on related specifically to that period.
- Match the tonality of the black and white image with colors – light colors work best over light tonalities etc. Or put another way, if someone in your black and white photo has light colored hair, don’t give them black hair!
- Most often the images I work with are old, and always benefit from restoring.
So, clean up the original image, restoring it where appropriate, removing spots and blemishes, and desaturate it to remove any color patches common with older photos. Adjust the contrast to produce a good starting point.
Right – let’s get started! The photo I’m working with today was obtained from the US Library of Congress, and has no known restrictions on its publication. This photo was taken in 1935, and is an excellent candidate for digital colorization.
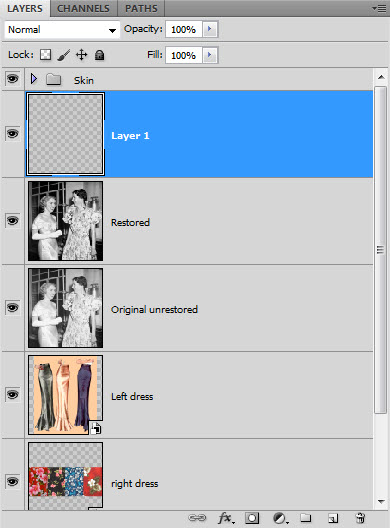
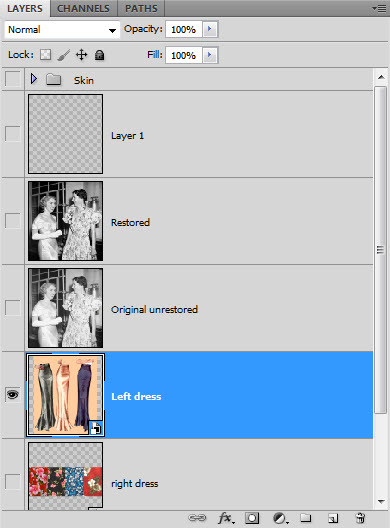
- Open the restored image, and name the layer accordingly – as you can see below, in this case I’ve named it Restored.
We will use this layer as our base canvas, and build colors by adding layers above it.
Drag the color sample images into the document, and place them underneath the original. Again, we will use these purely to source the colors for the image. 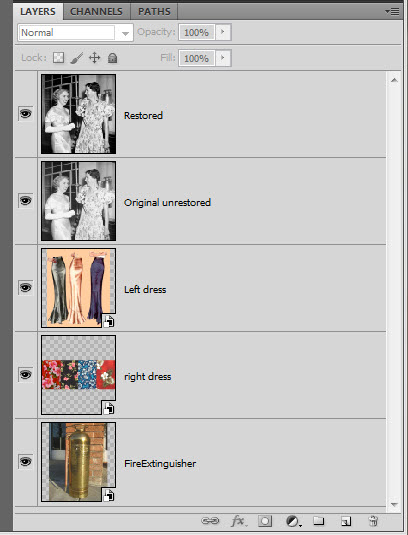
- I always start with the skin, as it helps bring the image to life. Select the layer named Restored, then create a blank layer above it by clicking on the Create a New Layer icon at the bottom of the Layers panel.
- Click the Foreground Color picker and select a light pink – the actual color doesn’t really matter as we will refine it shortly, but I do find it useful to start with a color that is close to skin tone.
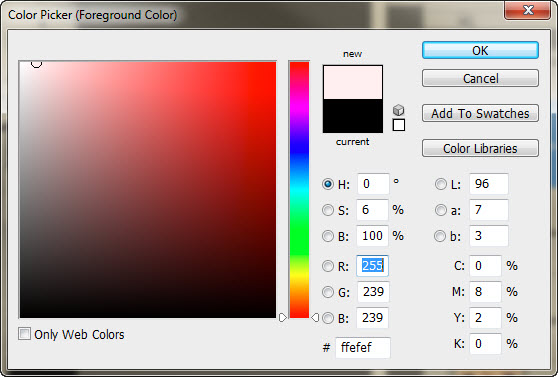
- Click OK, then fill the layer with the color by pressing the Alt+Backspace keys.
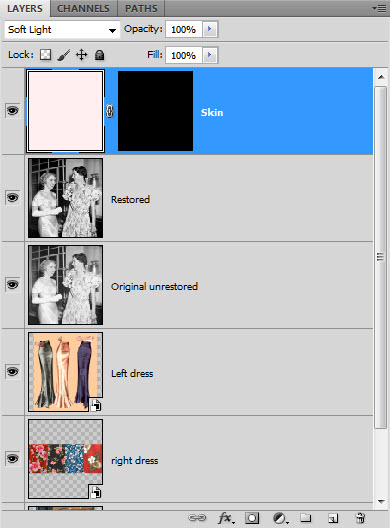
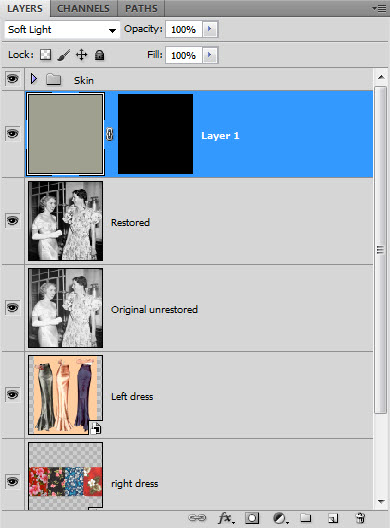
- Change the layer Blending Mode from Normal to Soft Light.

The entire image will now have a pink hue. Press and hold Alt while left-clicking on the Add a Vector Mask button at the bottom of the Layers panel. Holding Alt while clicking on the vector mask button fills the mask with black, which will hide the pink hue.
- Make sure the Mask is selected by clicking on it, and then select the Brush tool.
Set your Foreground color to White, and then paint over the skin, zooming in as necessary. Accuracy is important to ensure that you cover all the skin. Avoid painting skin tone on the lips or eyes.
Once you’re finished painting the mask, hold Alt and click on the Mask. This will show you if you’ve missed any areas. If you have, continue to paint as necessary, and then hold Alt and click on the Mask to return to normal view.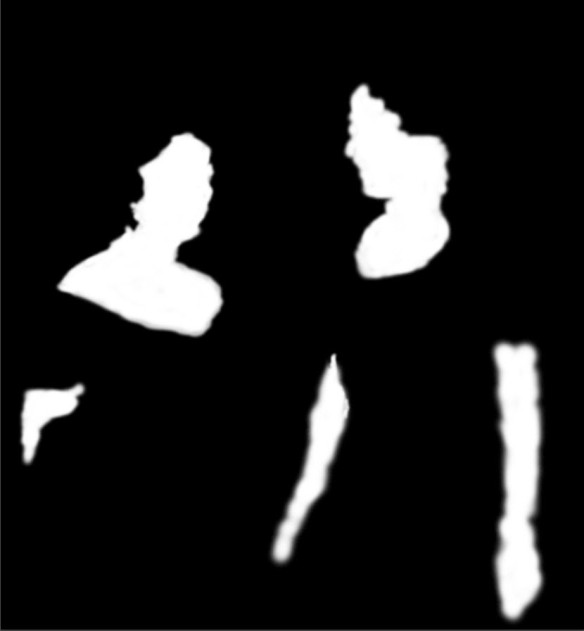
- From the Adjustments Panel, click on the Hue/Saturation, click the Colorize box, and ensure that this layer is clipped to the layer below.
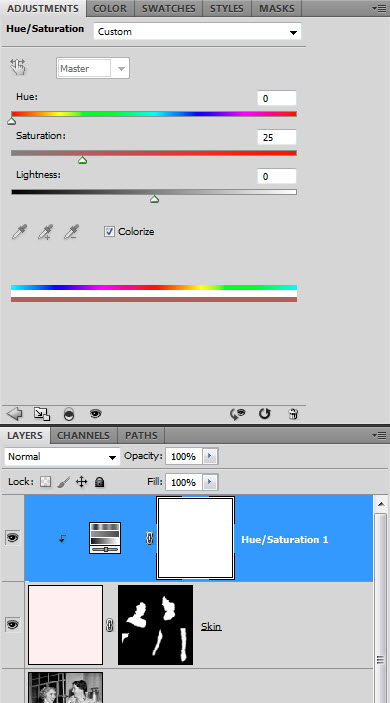
- Adjust the Hue, Saturation, and Lightness sliders as required until you get the skin tone that is pleasing to the eye. Remember though that we can always refine the colors once we have colored the entire image.
At times, it may be necessary to add a Color Balance adjustment layer to refine the colors further.
Remember that I said that the fill color isn’t overly important? Well, that’s because we are adjusting the color using the Hue/Saturation adjustment layer that the initial colors we use don’t matter greatly. We will be using this process for each of the remaining areas to be colored. 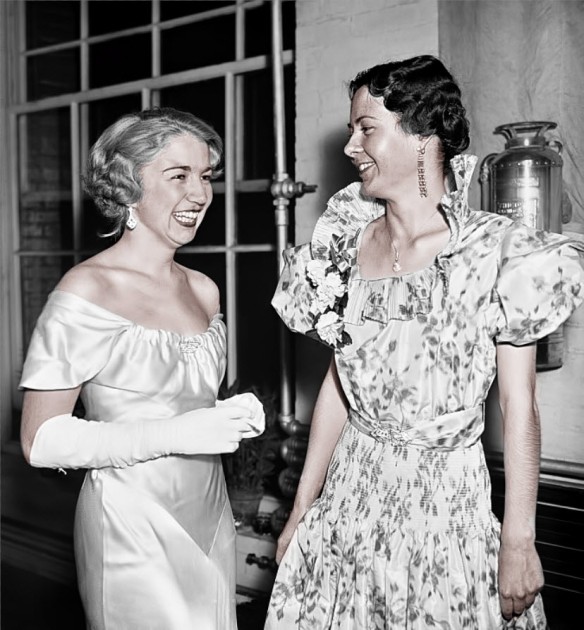
- Once you’re finished with the skin color, highlight the two (or three) layers relating to the skin, and press Ctrl+G to place these layers into a single group. Name this group Skin.
- Next, we’ll focus on the dress on the left hand side of the photo. Select the black and white layer immediately below the Skin group (the Restored layer in this case), and create a new blank layer above it.
- Select the layer containing the colors that you want to select from (in this case, the layer named Left dress), then hold the Alt key and left-click on the eye to show only that layer.
- With the Brush tool still selected, move your curser over the color you want to sample, and hold down the Alt key. Left click and drag the curser over the colors until you locate the color that you want. Release the Alt key and this color will now be the Foreground color. Alt-click on the eye to return the view to normal.
- Select the new blank layer, and fill it with the Foreground color by pressing Alt+Backspace. Change the layer Blending Mode from Normal to Soft Light. Press and hold Alt while left-clicking on the Add a Vector Mask button at the bottom of the Layers panel. This will hide the new color.
- With the Brush tool still selected, make the Foreground color white, and paint in the new color where required, zooming in to the image as necessary, returning the color just as we did with the skin.
- As with the skin layer, from the Adjustments Panel, click on the Hue/Saturation, click the Colorize box, and ensure that this layer is clipped to the layer below. Adjust the Hue, Saturation, and Lightness sliders as required until you get the dress color that you want. If you need to refine the color even further, add a Color Balance adjustment layer and fine-tune as necessary.
- Once you’re finished with the dress color, highlight the two (or three) layers relating to it, and press Ctrl+G to place these layers into a single group. Name this group Left Dress.
Repeat this process with the remaining elements, making sure that you color the hair and eyebrows; lips; eyes; any jewelry; and background items.
Once you’ve colorized everything, spend a bit of time zoomed in to the image, looking for any areas of overlapping color, and adjust the individual layers as required.
I often apply a Warming Filter from the Adjustments Panel to bring the whole image to life.
And finally, with this particular image, I’ve applied a vignette to the final image, and sharpened it slightly. As you can see, there is a dramatic difference between the original image, and the colorized image.
Pieter Brits is a professional photo editor and graphic designer, specializing in photo retouching. His passion is retouching and restoring photos, with over 20 years of experience in this field. Pieter lives in Brisbane, Australia, and can be freely contacted through Fiverr or on Facebook.


You must be logged in to post a comment.